AT89S52を以前入手していましたので、開発環境とUSBaspで書き込み、Lチカのプログラム実行を行って見たいと思います。
AT89S52は、8bitマイクロコントローラで、8051コアで動作し、プログラムメモリサイズ8KB、データRAMサイズ256B、5V動作の40ピンDIPです。
入手先は、マルツ、Mouser、Digkey、オレンジピコショップ、AliExpress、Amazonなど
開発環境は、Raspberry Pi3 上のRaspbianです。まずは、アセンブラをインストールします。
アセンブラは、これまで使用していた、ASxxxxを使用します。
バージョンが5.5になっているようなので、ここでは、再度コンパイルしています。
ASxxxxのホームSHOP-PDF.NETからThe ASxxxx Cross AssemblersのXの部分をクリックし、Get the "ASxxxx Cross Assemblers"のリンクマークをクリック、ASxxxx Cross Assemblers Source Code as a zipped file (9363K)をクリックして、ダウンロードするか、下記のWgetコマンドでダウンロードします。
$ wget https://shop-pdp.net/_ftp/asxxxx/asxs5p50.zip
--2024-10-02 16:48:25--  https://shop-pdp.net/_ftp/asxxxx/asxs5p50.zip
shop-pdp.net (shop-pdp.net) をDNSに問いあわせています... 76.189.128.19
shop-pdp.net (shop-pdp.net)|76.189.128.19|:443 に接続しています... 接続しました。
HTTP による接続要求を送信しました、応答を待っています... 200 OK
長さ: 9587782 (9.1M) [application/zip]
`asxs5p50.zip' に保存中

asxs5p50.zip             100%[=====================================>]   9.14M   793KB/s 時間 11s

2024-10-02 16:48:36 (863 KB/s) - `asxs5p50.zip' へ保存完了 [9587782/9587782]
解答展開します。
$ unzip -L -a asxs5p50.zipビルド会場に移動します。
$ cd asxv5pxx/asxmak/linux/buildコンパイルします。
コンパイルには少々時間が掛かります。コーヒーブレークしながら待ちましょう。
$ make
gcc -Wall -funsigned-char -O3 -I../../../asxxmisc/ -c ../../../asxxsrc/asmain.c -o asmain.o
gcc -Wall -funsigned-char -O3 -I../../../asxxmisc/ -c ../../../asxxsrc/asmcro.c -o asmcro.o
gcc -Wall -funsigned-char -O3 -I../../../asxxmisc/ -c ../../../asxxsrc/asdata.c -o asdata.o
・・・続きます。
生成された実行ファイルの場所に移動します。
$ cd ../exe
$ ls
_exe    as6100   as6804  as6812  as78k0   as8051    asavr    asez80   aslink   asrs08  assx    asz80
as1802  as61860  as6805  as6816  as78k0s  as8085    ascheck  asf2mc8  asm8c    asscmp  asxcnv  s19os9
as2650  as6500   as6808  as68cf  as8008   as89lp    ascop4   asf8     aspdp11  asst6   asxscn
as4040  as6800   as6809  as68k   as8008s  as8x300   ascop8   asgb     aspic    asst7   asz280
as430   as6801   as6811  as740   as8048   as8xcxxx  asez8    ash8     asrab    asst8   asz8
as8051とaslinkをシステムのbinフォルダーにコピーします。
$ sudo cp as8051 /usr/local/bin
[sudo] **** のパスワード:
$ sudo cp aslink /usr/local/bin
as8051とaslinkを確認します。
$ as8051 -h


ASxxxx Assembler V05.50  (Intel 8051)
Copyright (C) 2023  Alan R. Baldwin
This program comes with ABSOLUTELY NO WARRANTY.

Usage: [-Options] [-Option with arg] file1 [file2 ...]
  -h   or NO ARGUMENTS  Show this help list
・・・続きます。
$ aslink -h
ASxxxx Linker V05.50
Copyright (C) 2022 Alan R. Baldwin
This program comes with ABSOLUTELY NO WARRANTY.
Usage: [-Options] [-Option with arg] file1 [file2 ...]
-h or NO ARGUMENTS Show this help list
・・・続きます。これでアセンブラ環境はできました。
次は、書き込みのためのUSBaspを用意します。
AT89S52では、リセットのレベルが’H’でアクティブになるので、通常のUSBaspが使えません。
USBaspのファームウェアを変更することで、AT89S52対応にすることができます。
まずは、USBaspを2つ用意します。1つは通常のUSBasp用、もう一つはAT89S52ファームウェア変更用のUSBaspです。
ここではAmazonで販売されているUSBaspを用意しました。
「KeeYees USB AVRプログラマ USBasp AVRライタ 51 52 AVRシリーズ 専用ダウンロード用ケーブル付属 10ピン-6ピンISPアダプタ付属 2セット入り」
この製品では、JP2をショートすることで、ファームウェアを変更することができます。
ということで、JP2にピンを立てハンダ付けし、ショートバーでショートできるようにしました。
まずは、USBaspがちゃんと認識されているか、確認します。
ベンダーIDが16c0に プロダクトIDが05dcになっていればOKです。
lsusbを実行します。
$ lsusb
Bus 001 Device 006: .....
Bus 001 Device 007: ID 16c0:05dc Van Ooijen Technische Informatica shared ID for use with libusb
Bus 001 Device 005: .....
Bus 001 Device 004: .....
Bus 001 Device 003: .....
Bus 001 Device 002: .....
Bus 001 Device 001: .....
デバイス007でID 16c0:05dcと認識されています。
次にファームウェアを用意します。
AVR Freaks コミュニティのこちらのページを参照します。
下の方に移動して、Attachments:usbasp_AT89.zip を探します。
クリックして、ダウンロードします。
適当なディレクトリーを作成してその中で解凍します。
$ unzip -L -a usbasp_AT89.zip解凍すると同じディレクトリーに、main.hexとavrdude.at89及びfirmwareのディレクトリーが作成されます。
$ ls
avrdude.at89  firmware  main.hex  usbasp_AT89.zip
main.hexはファームウェアとして、avrdude.at89はAT89S52の書き込みの際に、avrdudeの書き込みコマンドの中で指定します。
まずはAT89S52ファームウェア変更用のUSBaspのファームウェアを書き込み準備します。
Raspberry PiのUSBに通常のUSBasp(JP2はオープン)を差し込み、AVR書き込みの差し込み口にもう一つのAT89S52用USBasp(JP2はショート)をAVR書き込みケーブルでお互いを接続します。
main.hexを書き込みします。
$ sudo avrdude -c usbasp -p m8 -U flash:w:main.hex:i
[sudo] **** のパスワード:

avrdude: warning: cannot set sck period. please check for usbasp firmware update.
avrdude: AVR device initialized and ready to accept instructions

Reading | ################################################## | 100% 0.01s

avrdude: Device signature = 0x1e9307 (probably m8)
avrdude: NOTE: "flash" memory has been specified, an erase cycle will be performed
         To disable this feature, specify the -D option.
avrdude: erasing chip
avrdude: warning: cannot set sck period. please check for usbasp firmware update.
avrdude: reading input file "main.hex"
avrdude: writing flash (4572 bytes):

Writing | ################################################## | 100% 2.75s

avrdude: 4572 bytes of flash written
avrdude: verifying flash memory against main.hex:
avrdude: load data flash data from input file main.hex:
avrdude: input file main.hex contains 4572 bytes
avrdude: reading on-chip flash data:

Reading | ################################################## | 100% 2.38s

avrdude: verifying ...
avrdude: 4572 bytes of flash verified

avrdude: safemode: Fuses OK (E:FF, H:D9, L:9F)

avrdude done.  Thank you.
これで、AT89S52用USBaspのファームウェアを書き込みしたので、JP2はオープンに設定します。
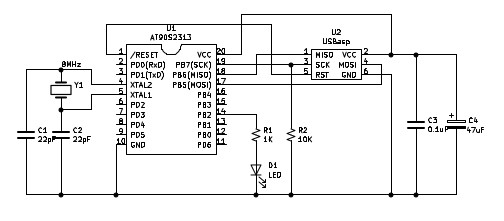
Lチカする回路図は下記のようになります。
電源は、usbaspの電源から補給しています。
31pin(/EA_VPP)はVCCに接続しないと動作しません。(動作しないのでちょっと悩みました)
Lチカのプログラムを用意します。
以前に作成したSTC12C2052のプログラムを1部変更(LED出力するpin番号とdelayの数値変更)したものです。
同じ8051コアなどで再利用が可能です。
; AT89S52  LED by Pinecone 2024/09/26
;
; AT89S52   cpu
; Flash ROM 8Kbyte
; RAM       256byte
; External clock 12MHz (max33MHz)

; assembler
;  program start 000H
;  main          100H
;
; assemblers  ASxxxx and ASlink V5.50
; file name AT89S52_led01.asm
; $ as8051 -l -s -o AT89S2_led01.asm
; $ aslink -i AT89S52_led01
;   program download  $sudo avrdude -C avrdude.at89 -p s52 -c usbasp -P usb -U flash:w:AT89S52_led01.ihx:i
;

	.area	TEST(ABS)

	.org	0x0000

	ljmp	main

	.org	0x0100
main:
loop:	setb	p1.0
	lcall	delay
	cpl	p1.0
	lcall	delay
	sjmp	loop

delay:
	clr	a
	mov	r0,a
	mov	r1,a
	mov	r2,#0x2
delay1:
	djnz	r0,delay1
	djnz	r1,delay1
	djnz	r2,delay1
	ret
アッセンブル、リンクします。
$ as8051 -l -s -o AT89S52_led01.asm
$ aslink -i AT89S52_led01

ASlink >> -i
ASlink >> AT89S52_led01
書き込みします。
アッセンブル、リンクした同じディレクトリにavrdude.at89をコピーします。
先ほど用意したAT89S52用USBaspを使用してRaspberry PiのUSBに接続して書き込みします。
$ sudo avrdude -C avrdude.at89 -p s52 -c usbasp -P usb -U flash:w:AT89S52_led01.ihx:i
[sudo] **** のパスワード:

avrdude: AVR device initialized and ready to accept instructions

Reading | ################################################## | 100% 0.00s

avrdude: Device signature = 0x1e5206 (probably s52)
avrdude: NOTE: "flash" memory has been specified, an erase cycle will be performed
         To disable this feature, specify the -D option.
avrdude: erasing chip
avrdude: reading input file "AT89S52_led01.ihx"
avrdude: writing flash (280 bytes):

Writing | ################################################## | 100% 0.38s

avrdude: 280 bytes of flash written
avrdude: verifying flash memory against AT89S52_led01.ihx:
avrdude: load data flash data from input file AT89S52_led01.ihx:
avrdude: input file AT89S52_led01.ihx contains 280 bytes
avrdude: reading on-chip flash data:

Reading | ################################################## | 100% 0.10s

avrdude: verifying ...
avrdude: 280 bytes of flash verified

avrdude: safemode: Fuses OK (E:FF, H:FF, L:FF)

avrdude done.  Thank you.
約0.3秒ごとに点滅します。


